Quantcast
Channel: Skip To My Lou
Viewing all 1060 articles
Browse latest View live

How to Make The Best French Toast

$
0
0
how to make the best French toast

How to Make The Best French Toast! We love french toast at our house.  Take any french toast recipe, to a whole new level, with these two easy steps.

how to make the best French toast

How to Make The Best French Toast

Step 1

Thick Slices of bread make the best french toast.  They simply absorb the batter better.

bread

Step 2

Toast the bread lightly beforehand.  You can use a toaster for a small batch but an oven works best. This step prevents the bread from becoming soggy and gives you a light crisp and never soggy result.

French toast


Recipe and Directions

Ingredients

4 eggs, lightly beaten
1 cup half-and-half or light cream
2 tablespoons sugar
2 teaspoons vanilla
1 teaspoon ground cinnamon
1/4teaspoon ground nutmeg
8 slices dry white or whole wheat bread
2 tablespoons butter or vegetable oil
Maple-flavored syrup
Sliced bananas and walnuts (optional)

Directions

Preheat the oven to 300F
Place bread on a wire rack or baking sheet. Bake bread about 8 minutes. flip, then bake another 8 minutes. Remove from rack and let cook 5 minutes. You can also use a toaster, turn it to the lowest setting and watch it.  For large amounts, an oven works best.
Whisk ingredients together.
Transfer the mixture to a large baking dish.
Coat the bread in the batter for about 30 seconds on each side, then move to a baking sheet.
Turn oven to warm and store dipped toast in the oven to keep warm.
Add butter to a skillet, and cook over low heat. Transfer slices of bread to the skillet and cook until golden brown, about 3 to 4 minutes, then flip and cook for another 3 to 4 minutes.
Transfer toast to a baking sheet, and place in the oven.
Repeat until all toast is cooked. Serve on my favorite white dishes with warm butter, powdered sugar, and/or maple syrup.  We added walnuts and freshly sliced bananas for extra flavor.
Enjoy!

breakfast

Recipe adapted from Better Homes and Gardens


The post How to Make The Best French Toast appeared first on Skip To My Lou.


How to make a child’s chef hat

$
0
0
Childs-Chef-Hat.jpg

You won’t believe how easy it is to make a chef hat. Just a few steps you can whip one up in no time at all. They make great handmade gifts, especially when paired with a matching apron! Add a few cooking supplies and you have a fun and useful gift!

chef hat

Kids Chef Hat Supplies

  • 1 –  18″  fabric circle
  • 1 –  8″ X 24″  fabric rectangle
  • 1 – 8″ X  24″ lightweight to medium weight iron on interfacing
  • dental floss
  • 1/2 inch Velcro (about 12″)
  • 3″ piece of double fold bias tape
chef hat cutting instructions

How to make a chef hat

Follow these steps and you will be able to make loads of kids chefs hats! This hat is adjustable so it will fit kids of all ages.

Iron interfacing to the 8″ X 24″ piece of fabric following manufacturer’s instructions. Press fabric in half lengthwise and press each edge under 1/2″.

Fold piece right sides together, starting 1/2″ down from the open side, stitch across each end.

Turn right side out.

Stitch a 3″ piece of bias tape around an edge of the fabric circle.

Around the outside edge of the fabric circle use a wide zigzag to stitch over a piece of dental floss starting and stopping on each side of the 4-inch piece bias tape. Be careful not to catch the floss with the needle. This traps the floss and allows it to be pulled to gather.

This method is used to gather the circle (as opposed to sewing two rows of basting type stitches and pulling the seams to gather). This starts at one end of the 4″ bias tape that was sewed on previously and ending at the other end of the bias tape.

You can always sew two rows of stitches to gather. I prefer the dental floss because I never worry about the gathering threads breaking.

Gather.

Pin the band piece around the gathered edge. Find the center of band and center of the top piece and begin pinning there.  Adjust gathers until the band fits the gathered edge, starting at stopping about a 1/4″ over the bias tape on each side (notice how the 1/2″ that wasn’t sewn on each end neatly slips around the bias tape). Pin heavily to keep in place.  This takes some adjusting but it is so nice to have all the unfinished edges covered.

Sewing very close to the edge, sew band to the top of the hat, removing pins as sewing to keep band flat. It might be necessary to slightly pull the band to keep it smooth.

child's chef hat

In the back fold left side over as far as the bias tape opening will allow on top of right side. Place Velcro in this overlapping area and sew all four pieces to the hat band.

Sew along each edge of each end if desired, to close area placed over bias tape.

Finished!

chef hat tutorial

Now you can make this apron pattern to make a cute child’s apron and your child will be the most stylish chef ever!

child's apron tutorial

The post How to make a child’s chef hat appeared first on Skip To My Lou.

2018 First Day Of School Signs

$
0
0
first day of school signs

These free printable first day of school signs are a quick way to date your back to school photo this year. They have that popular chalkboard look, but you didn’t have to write them out!  They make the perfect photo prop and it’s a handy way to mark the year in the photo album. I love looking back through these photos and seeing the changes each year!

Free 2018 First Day Of School Signs

All the grades are included in the download.  You can choose to print only the pages you need! The back to school photo is a big deal at our house! Each year we use these first day of school signs to capture that special first day each year.  I can’t believe summer break is over and school is starting! I can’t believe I have a seventh grader and two in college. For another back to school, idea don’t miss this first day of school teacher gift.  It is a great way to let your teacher know you are willing to lend a hand this school year.

{download 2018 First Day of School Signs}

first day of school signs

{download 2017 back to school signs}

Wow, this year Bella has really changed! We are starting this school year with a bunch of firsts. It is the first day of middle school and we now have braces! These first day of school signs has helped us remember all the growth we have seen.

2017 back to school signs

Our back to school signs through the years!

Simply download and print them out on heavy cardstock. For best copies download the file and attach in an email and send to a copy shop like Office Max or Kinkos. Tell them which pages you need printed. If the file is too big to email you may need to send the individual pages.  Download and choose page. Select print and in the print options select print to PDF. It will give you the prompt to save as PDF.  Email the PDF to the copy shop.  Cut off the white border (if you like)  and you are ready for first day of school photos!

{Printable First Day of School Signs 2016-17}

first day of school signs for the back to school photo


Back to School Photo Signs

Printable First Day of School Signs 2015-16

{Printable First Day of School Signs 2015-16}

back to school photo signs

Printable First Day of School Signs 2014-15

{Download Printable 2014-2015 Back to School Photo Signs (kindergarten through senior)}
back to school photo signs 2014-2015

Printable First Day of School Signs 2013-14

{Printable Back to School Photo Props}

back to school photo prop free printable back to school photo prop

I really wanted a picture of the two of these kids together. Let me tell you that Bradley is an ornery one! It wasn’t until later that he confessed that they held the signs up side down! I hadn’t even noticed when I was taking the picture!back to school photos

More ways to celebrate the first day of school

First Day of School Coloring Page phone fan FANtastic teacher gift teacher favorite things questionnaire printable


The post 2018 First Day Of School Signs appeared first on Skip To My Lou.

Mini Cheesecake Recipes

$
0
0
individual-strawberry-cheesecake.jpg

These mini cheesecake recipes are the perfect way to serve a treat. Everything is cuter and tastes better in mini form!  Seriously, though they are perfect for parties, showers or even a BBQ’s. Everyone will love this grab and go dessert option. Most of these recipes are very easy to put together with a good variety of recipes. Don’t love cheesecake? I also love these mini chocolate piesThis chocolate pie is oh so rich and creamy. A treat for sure. 

Mini Cheesecake Recipes

I love serving dessert in special cups. This individual No Bake Strawberry Cheesecake Dessert works perfect in tall  mini plastic cordial cups. These would be a delicious dessert for a summer party or other celebration!

individual-strawberry-cheesecake.jpg

Mini Chocolate Chip Cheesecakes – bite size cheesecakes made with miniature chocolate chips, whipped cream and topped with chocolate chip cookies.

An easy two ingredient Oreo crust topped with a smooth and creamy Oreo cheesecake filling.  These Mini Oreo Cheesecakes make a perfect dessert for any time of year!

THE BEST recipe ever for Mini Cheesecakes! Cheesecake filling with graham cracker crust made in cupcake tins. Your kids will beg you to make these again and again!

mini cheesecakes

Did you know you can make mini cheesecakes with biscuits as the crust? Top your white chocolate cranberry mini cheesecakes with white chocolate curls and confectioner’s sugar and you have a delicious dessert.

mini cheesecakes

Miniature chocolate cheesecakes are super cute and super delicious and are very easy to make! Chocolate cheesecake is perfect in mini form, so much less rich! 


Be sure to stop by tomorrow for another Made By You Monday. Who knows next week I could be featuring you.

Don’t miss a thing! Sign up to get crafty ideas, recipes, sewing tutorials and more delivered right to your inbox. Follow Skip to My Lou on FB and Google+ to find out the latest news! Join me at Pinterest and Instagram for an extra dose of fun!

The post Mini Cheesecake Recipes appeared first on Skip To My Lou.

Made By You Monday

$
0
0

It’s Monday show us what you’ve got. It is time to link up your crafty goodness! Please don’t forget to link back! — a text link at the bottom of your post, or link somewhere on your blog is okay!

made by you monday


By linking up to Made By You Monday. You give permission for one photo and a link to be featured in a post, and on social media.  This is to promote you and your site.

The post Made By You Monday appeared first on Skip To My Lou.

Have a bright school year printable tags

$
0
0
saying for markers and highlighters

Wish kids back to school with these cute Have a bright school year printable tags.
back to school gift

Fun back to school party favors

We used these printable tags to make colorful gifts for our back to school party! These tags are perfect for markers, highlighters, crayon or colored pencils! They work for any bright and colorful gift! My middle schooler wanted Sharpie markers of course!

Have a bright school year gift tag

Have a bright school year printable tags

There are two versions. Enjoy a full-color version in case you need too many to color yourself.

[Colored Have a bright school year tags]

colored have a bright school year tags

If you love to color the black and white version is perfect for you! Download the file of your choice and print on white cardstock.

[Black and White Have a bright school year tags]

black and white have a bright school year tags

Cut out the tags and punch a hole in the top of the tag. We gathered up the markers with a rubber band before tying on the tag with the ribbon. The rubber band will keep them more secure than only the ribbon.

saying for markers and highlighters

More ways to welcome teachers and kids back to school

The have a bright school year printable tags make great back to school party favors or sweet little gifts for students. If you are looking for back to school teacher gifts check out these teacher tags. A cute saying is paired with a small useful gift.

Back to School Teacher Gift Tags

back to school gift tags

From candygrams to needed supplies you will find the perfect way to welcome your teacher back to school.

Teacher Gifts

notable year teacher gift post it notes

Don’t forget to mark the first day of school with a back to school photo. Can you believe that little cutie is now going into 8th grade!?!

First Day of School Photo Signs

back-to-school-photo-signs-2014-2015.jpg

This coloring page or some call it a back to school graphic organizer will also make a wonderful keepsake.

Back to School Coloring Page

First Day of School Coloring Page

I hope you have a bright school year!

The post Have a bright school year printable tags appeared first on Skip To My Lou.

Back to School Coloring Pages

$
0
0
First Day of School Coloring Page

I think this is one of the cutest back to school coloring pages you can find! You will be able to document the new school year with this first day of school graphic organizer (thats is what my teacher friends call it).  What a special way to remember all the firsts! We go back to school today and are getting excited for a new year, how about you?

Back to School Coloring Pages

Just download, print and grab some crayons, markers or colored pencils! Let the kids spend some time coloring. You will love seeing their answers.  It is a fun activity that will create a keepsake for years to come!

download the {Back to School Coloring Page}

Back to school coloring pages

If you are looking for more ways to celebrate back to school make sure you take that first day of school photo with this cute chalkboard looking printable sign.

Back to School Signs} they are updated every year!

2017 back to school signs

Back to school teacher gifts

A little back to school gift for the teacher is another way to start the new school year off right! If you have a FANtastic teacher she might like this phone fan teacher gift or these back to school gift tags make gift giving super easy.  All you do is print and attach to a small item for a “Pun-tastic gift!  Each printable even comes with gift ideas. Click the link for a cute Sharpie marker gift tag for free and learn how you can download over 50 more back to school teacher tags for $4.95. Your teacher will be happy you did!

{Back to School Gift Tags} Click here to learn more!

back to school candy gram gift tags

If you want to celebrate your teacher this year have them fill out this my favorite things questionnaire. You will know exactly what they like!

Favorite Things Printable Questionnaire for teachers

Favorite Things Teacher Questionnaire

If you want to wish your student a bright school year use these tags attached to markers, highlighter, paints or crayons for a darling back to school gift

Have a bright school year gift tags

back to school gift

If you have an extra sweet teacher download these free tags for the best back to school teacher gifts!

candy gram back to school teacher gifts

This can be a great way to open the lines of communication and let the teacher know you want to be a part of your child’s school year. I really like this “If I can give you a hand” gift idea.

The post Back to School Coloring Pages appeared first on Skip To My Lou.

DIY Lego Table {IKEA Hack}

$
0
0
Lego Table

We made an IKEA side table into a Lego table because Thomas The Train is no longer a crowd pleaser in our house. We have now become the House of Lego. My 6-year-old son is acquiring Legos by the gallon and we are constantly looking for new places to put them all. We loved our precious train table that our son got for his second birthday, and we were sad when it fell apart. I started looking for something similar to build Legos on and realized that Lego tables are pricey.

Your little Lego lover might also like these Lego tattoos. If you are having a party these Lego Cupcake toppers would be super fun.

Lego Table

Lego Table

My husband kept coming up with the next big “brilliant” idea for  Lego tables but never followed through. He was going to build one out of wood but had to draw up plans, cut the wood, built it, etc. While we were shopping at IKEA one day, I had an epiphany. Why don’t we use one of IKEA’s inexpensive tables and build our Lego table out of that? We chose the Lack Side Table in black. We didn’t want to build a huge Lego table because we have a small house, and Lego Baseplates can get expensive.

Because we’ve been busy with our full-time jobs, Angry Kid, Little League, and several other projects, our Lego Table got put on hold for about a month. I politely asked (nagged) Angry Husband if we could work on the Lego Table this past weekend.  For the love of Lego at our house, we need a great table to build and play on!

Lego Table Supplies

  • IKEA Lack Table
  • Lego Baseplates (1 Extra-Large Gray Lego Baseplate and 4 regular green Lego Baseplates)
  • Exacto knife
  • Level or ruler
  • Sharpie or other permanent marker
  • Spray Adhesive or Contact Cement (We used spray adhesive, not suggested, we had to fix it)
  • Painter’s tape (for temporary securing of the Lego Baseplates to the table)
  • Dremel or Laminate Cutting Tool (to trim the edges of the table)

IKEA Side Table

We started with the IKEA Lack Side Table (I have no pictures of ours, but here is the stock photo from IKEA).

IKEA side table

DIY Lego Table

We then centered the gray Lego Baseplate in the middle of the table. This Lego Baseplate is extra-large. You could use all green Lego Baseplates, but we made the center look like a “street” and surrounded it with green Lego Baseplates for “grass”. After the centerpiece was measured out, we taped it down to the table with blue painter’s tape.

Lego Tables Tutorial

We then took the green Lego Baseplates and placed them around the edges of the table. We temporarily secured the green Baseplates to the gray Baseplate with Legos. Angry Husband then went underneath the edge of where the green Baseplate comes up to the edge of the table and took a Sharpie to mark the area to be cut (excess Baseplate). Angry Husband then used a level as a straight edge and cut the green Baseplate on the backside (non-bumpy side) with an Exacto Knife. He said that he did not cut all the way through, but scored it. He then snapped the plate to break it into two pieces.

DSC_0027

After each cut was made, Angry Husband placed the cut pieces of green Lego Baseplate around the edges of the table. He secured them with Legos to the gray piece. This may not seem important, but it is VERY important to the layout of this Lego table. You have to secure the pieces with Legos for proper spacing. If you butt the pieces of together and just tape them, they will not line up. Angry Husband showed me this. It is very easy to make a mistake during this part of the process. We had a box of loose Legos nearby that we used for placement.

DIY Lego Table Tip:

When laying out the baseplates it important to secure them with Legos for proper spacing to make sure the legos will snap to the plates properly when kids are playing.

DSC_0028

We left a little extra of the green Lego Baseplate hanging off the edge of the table. Angry Husband said that we needed it, just for error and placement after the glue was laid out. The excess Baseplate will be trimmed at the end of this project. After all the Baseplate has been cut and laid out, the table will look like the photograph below.

Lego Table Tutorial

Angry Husband then taped butcher paper around the edges of the table to project is from the glue, and well excess glue.

Lego Table Tutorial

We then removed the Lego Baseplates from the table (gently holding them together). We sprayed the IKEA Lack Side Table with spray adhesive. We also CAREFULLY flipped over the Lego Baseplates and sprayed the back of them with spray adhesive. We recommend you use contact cement. We had to fix some edges that did not firmly glue down.

Lego Table Tutorial

Lego Table Tutorial

We left the Lego Baseplates and table sit separately for thirty minutes for the glue to set up. Angry Husband then cut up some cardboard strips to help place the Lego Baseplates onto the table. Angry Husband laid them out and we gently flipped over the Baseplates.

Lego Table Tutorial

Lego Table Tutorial

We then carefully removed the cardboard strips after the Baseplates were centered on the table. After each strip was removed, we pressed down on the Baseplate of that area. Angry Husband said that we needed something heavy to place on top of the table to hold the pieces together until the glue was firmly set. We were very tired as it was late. He grabbed the first thing he saw, a bucket of screws.

Lego Table Tutorial

After two days, Angry Husband removed the box of screws from the table. He also removed the blue painter’s tape that he had on the table for precautions. He then used a laminate cutter (you can use a Dremel or similar tool) to cut the excess Lego Baseplate from around the edges of the table.

Lego Table IKEA Style

Can you believe it? A cool DIY Lego table made out of an IKEA side table.

Lego Table Tutorial

The Lego table IKEA style has been a big hit at our house.  It is small enough that it doesn’t require storage space but plenty big enough to build and play on top of.  Now we need a great design for Lego storage!  That will be our next project.

Random Trivia and Information Related to This Project:

  • The word “Baseplate” was used 28 times in this blog post.
  • I need to let my husband move Lego City Fire Departments. I went to move my son’s Lego City Fire Department for the staging and pictures for my post and dropped it. It literally crumbled into hundreds of tiny pieces. My son would have been traumatized if he had seen the condition of it. Angry Husband had to re-build the entire Fire Department.
  • KEEP your Lego Kit instructions. You never know when you have to rebuild something.

We are lucky to have Julie also known as Angry Julie guest posting today. She lives in Orange County, CA and works full-time in the legal sector taking photographs. She is married and has a 6-year old son. When she isn’t busy taking pictures of her son, she is photographing her food. Sometimes, Julie attempts to be crafty so she can be friends with Cindy, from Skip To My Lou. Find more of her photographs and ramblings on her blog at Angry Julie Monday.

The post DIY Lego Table {IKEA Hack} appeared first on Skip To My Lou.


Sock Bun {FREE pattern & how to use}

$
0
0
crochet-bun-shaper-free-pattern.jpg

The sock bun is the latest hairstyle trend and with this crochet bun shaper, it is super simple to create the perfect sock bun. Whether you call it a bun or donut, a DIY sock bun or bun shaper it is a handy tool to easily create beautiful hair buns. A big thank you to Tip Junkie who spent the weekend with us and showed us how cool we could be!  We have been having loads of fun creating this hairstyle.sock bun

Sock Bun Supplies

  • Worsted weight yarn in the color of hair
  • Size H crochet hook
  • yarn needle

How to make a sock bun

This simple tutorial will show you how to make a sock bun. It is a quick and easy project!

Chain 25

Double crochet in the second chain from hook, double crochet in each chain across (24 stitches)

Chain 2 (acts as first double crochet), double crochet in each double crochet across.

Repeat until you have 12 rows of double crochets.

Fasten off, weave in ends.

The size can be adjusted by the amount of stitches. For a smaller hair bun try 20 stitches across.

how to make a sock bun

Starting at the chain end, roll it up. With a tapestry needle close the tube with a whipstitch.

crochet sock bun tutorial 2

There should be a nice long even tube.

crochet sock bun tutorial 3

Bring the ends of the tube together to create a donut shape. Securely whipstitch the ends together.

crochet bun shaper

How to make a bun

Now let me show you how to make a bun with this crochet bun maker. It creates beautiful hair buns!

Put  hair into a ponytail
how to make a bun step 1 ponytail
Pull the ponytail through the crochet bun shaper.
How to do a sock bun

Let hair cover around the crochet bun shaper so it is completely covered.
how to make bun
Fasten with an elastic ponytail holder.
how to use a bun maker

how to make a bun in hair step 4a

Bobby pin the loose ends of hair into place around the base of the bun covering the elastic  hair band.

how to make a bun in hair step 5a

 There you have it a beautiful hair bun!

how to make a bun in hair step 5

Now you know how to do a sock bun!

More Girls Hairstyles

Pigtail Hairstyles

Twist me Pretty Hairstyle

Hair Tutorials

If you love to crochet be sure to check out all the beautiful free crochet patterns.


Don’t miss a thing! Sign up to get crafty ideas, recipes, sewing tutorials and more delivered right to your inbox. Follow Skip to My Lou on FB and Google+ to find out the latest news! Join me at Pinterest and Instagram for an extra dose of fun!

The post Sock Bun {FREE pattern & how to use} appeared first on Skip To My Lou.

Essential Oils for Anxiety & Back to School Stress

$
0
0
inhaler

Have you tried essential oils for anxiety? Anxiety disorders are the most common mental illness in the U.S.  Did you know that they affect over 40 million people each year.  If you are a parent to a child struggling with any sort of anxiety issues, then you probably have had your own feelings of panic, being overwhelmed, and a desire to move mountains to ease the pain and suffering of your child.

school-bus-2007.jpg

As our kids head back to school I wanted to share a story.  Actually, my friend, Stacy will tell our story about turning to essential oils for anxiety relief. Yep, it was me that she thought was crazy. I knew she felt that way when I suggested she get her daughter an inhaler! She didn’t want her daughter to get used to sniffing something every time she was overwhelmed. I completely understood her resistance but encouraged her to think about it as giving her daughter a tool to take control of the situation. 

Let Stacy tell you what happened……….

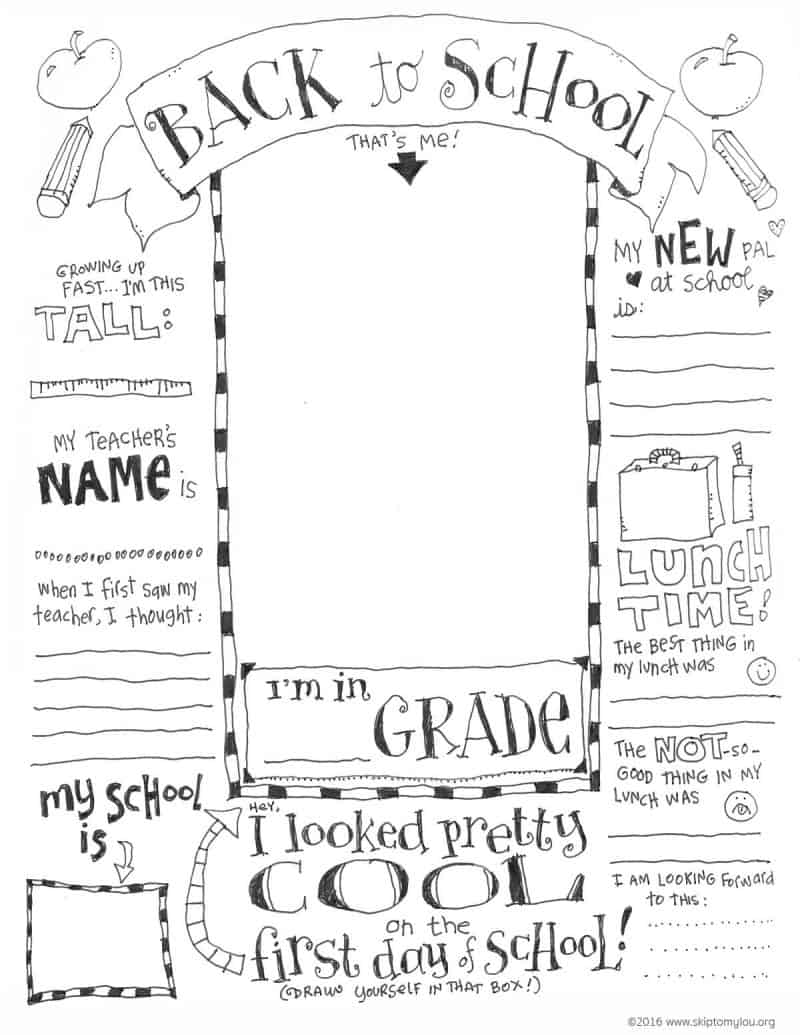
Children and School Anxiety

Our daughter starting displaying some school-related anxiety during her 4th-grade year.  She began to panic that she wasn’t prepared for tests and worried about falling asleep in time to get a good nights rest before the school day.  I talked to her teacher and we decided on better communication between us to help our daughter succeed, and an earlier bedtime to help her at night.  All kids have different levels of anxiety for a variety of reasons throughout their childhood, so her teacher assured me that she would most likely outgrow some of these quirky behaviors.

Fast forward to 5th grade when my sweet and funny little girl began to quickly spin out of control. This was the first time a good friend suggested that I try essential oils.  Knowing that my friend had been through a lot worse of a storm raising a child with Aspergers, I still politely took her advice and declined her offer of help with oils.  I love her dearly (and should have realized her wisdom in this anxiety area) yet considered her offer to be in the same genre as voodoo.

Our two oldest daughters breezed through grade school, and we couldn’t understand what we were doing wrong with our youngest.  Her 5th-grade year was throwing off the whole peaceful–well mostly peaceful–dynamic of our family.  Homework was my nemesis.  Studying a list of spelling words would have her on the floor screaming and crying, and reviewing for a science test would have her completely shut down in her bedroom kicking at her closet door.  Her bedtime routine became a nightmare for me.  She became super time sensitive and never left like she had enough time.  She began to sleep in the clothes she planned to wear the next day and even though she went to bed at 8:30, she began to panic every minute that the clock crept closer to 9:00 pm.  If she wasn’t fast asleep by 9:00, Pandora’s box was opened and she would tighten up every muscle in her body and look like she was having a seizure on her bed.  My heart would break into a million pieces.  Desperate to help her, I would give her Benadryl, rub her back until she fell asleep and then drink a glass of wine and eat chocolate–almost every single night that first semester.

Although she exhibited no signs of anxiety at school, I was able to convince her teacher that I needed help. I think it was me breaking down into tears telling her about our home life while she was trying to eat her lunch in the teacher’s lounge.  She gave me plenty of notice for upcoming tests, told me not to worry about spelling words, and helped me get my daughter into the school counselor’s office for small group anxiety work.  Yes!  We had a plan!  She also recommended a family counselor and we started meeting with him over Christmas break.  He helped us with a couple of tools.  One of which was to help her write lists of what needed to be done each evening so that she could see she had plenty of time to complete the list, and the other was to create a safe place that she could retreat to for a few minutes when homework (or anything) seemed to be a little much for her.  The most important thing that I learned was that she didn’t have control over this.  What seemed like a two-year-old tantrum that I should punish, was really something that she needed to recognize was building up inside of her and she needed to the tools to help her figure out what to do next.  The counselor suggested anxiety medication and in my heart of hearts, I just wasn’t ready to go down that path yet.  I wanted to figure out the tools but in the meantime, the rest of the house was falling apart.  My husband and other two daughters were getting less and less of my time, the housework was piling up, we were all losing patience with the youngest and all of this wine and chocolate had put 20 pounds on me!

Essential Oils for Anxiety Relief

When my dearest friend once again suggested essential oils in the form of lavender in a diffuser, I had nothing to lose.  At this point, if she told me stuffing needlepoint pins into a voodoo doll would help my daughter, I was all in!  I bought two diffusers and starting diffusing lavender oil in the kitchen and also in my daughter’s bedroom.  This is where my essential oil story began.  As the whole house began to smell wonderful, I had high hopes.  My little one loved her diffuser with the fun changing colors and it became a great part of her evening routine.  I added a little lemon and eucalyptus to the kitchen diffuser and even though the house was still in disarray most days, it at least smelled good, and it seemed to put us all in a little better mood.  For their patience, I rewarded my older two daughters with their own diffusers, and I was honestly surprised when they told me how much better they were sleeping each night.  What?  I didn’t even know they were feeling restless!

Lavender oil was not the simple answer I was hoping it would be.  I felt more relaxed and cheerful, my older daughters loved the lavender, but nothing really changed with my youngest daughter.  My friend told me that her family loved to diffuse a blend called but Peace and Calming, but that same scent agitated her son with Aspergers. My daughter often commented on the lemon and eucalyptus diffusing in the kitchen, so with a little hesitation, I put that in her bedroom.  I added a couple of drops of lavender because I worried that the other two scents were invigorating mood boosters.  Eeek!  How would that help her sleep?  That is when I researched and learned that scents affect everyone differently and, invigorating scents like lemon can help boost your mood in the morning and can actually help you relax in the evenings.  I felt I had stumbled upon some ancient magic potion.  It didn’t solve all of our problems, but it did start helping our evening routine.

One of the best tools we found for panic attacks was an essential oil inhaler.  Once again, I resisted this at first.  I didn’t want my daughter to get used to sniffing something every time she was overwhelmed.  But my rock star friend insisted that I try it and physically brought one over to my house. I put the same three oils on the little cotton wick and loaded it up into the inhaler.  We paired the inhaler up with some meditative breathing.  She held the inhaler under her nose and breathed in for 5 counts, held for 3 counts, and breathed out for 5 counts.  I could instantly see her body change as her muscles relaxed from their tense state, and her whole body assumed a more calming posture.  We used this during stressful homework sessions, bedtime, and many times when things just weren’t going as she had planned.  I honestly believe that the inhaler and meditative breathing are one of our best tools.

Oils for Anxiety

After much research into this topic, here is a list of the top ten essential oils for anxiety.  Although everyone is different, you are sure to find something on this list that can help calm your body.  Inhaling essential oils allow their molecules to travel directly to our brain through the olfactory system.  Once there, they can affect our hormones and stress levels.  Our brain produces neurotransmitters such as serotonin and dopamine allowing our body to feel good and to relax.  Research has shown that essential oil diffusers can have a calming effect in the workplace and I truly believe that we will begin to see them in more and more classrooms too!

  • Lavender
  • Rose
  • Ylang Ylang
  • Bergamont
  • Chamomile
  • Frankincense
  • Patchouli
  • Lemon
  • Clary Sage
  • Jasmine

I think that it is important to note that I am not a doctor or even an essential oil specialist. I am just a mom trying to figure out what is safe and what works best for my family.  Essential oils for anxiety has been a lifesaver.  If my research and trial and error somehow helps you and your family, then I am delighted to be sharing this with you!  I do want to mention that in all of the research that I did, one thing that comes up time and time again is the importance of using therapeutic-grade oils that don’t contain synthetic fragrance.  This is so important!  You definitely don’t want to be breathing in toxins! It is one of the reasons that I chose to seek out the Young Living Oil company.  Their oils are 100% certified organic and therapeutic grade.  Their starter kit is over a $350 value for only $160 and includes 12 of the most commonly used oils (a great way to try something new!) a diffuser, and some samples of their Thieves cleaning product (amazing stuff!) and Ningxia wellness drink.  If you are interested in giving this a journey a try, you can sign up here and send me any questions that you might have.  It is a journey that has been and continues to be a blessing to my family.

young living starter kit

FREE Inhalers and Essential Oil Educational Resource

I know you will love the oils as much as we do. If you want to sign up let me know and I will send you a couple inhalers for FREE. I also will send you an educational resource that we use as a reference guide for what each oil can do. Go sign up, and then email Stacy and me at skiptomyloushop@gmail.com and we will send you your free inhalers and an educational resource. If you are already using Young Living sign up the amazing essential rewards program (earn increasing points each month towards products and reduced shipping YAY!) and we will send you the free inhalers.

Don’t hesitate to ask us any questions.


The post Essential Oils for Anxiety & Back to School Stress appeared first on Skip To My Lou.

Weight Watchers Recipes

$
0
0

Looking to lose some weight?  These weight watcher recipes are just what you need.  Have you tried their new weight watchers freestyle? I have heard it is much easier to follow and allows a lot more meal options.

Weight Watchers Recipes

Weight Watchers focuses less on dieting and more on lifestyle change. Once you learn to control your portions and make better decisions with food it won’t control your life anymore.  The recipes can be made for lunch or dinner with meal plans or even in your crockpot. You are sure to find something you love here. I have also shared this weight loss soup recipe, some people call it fat flush soup, filled with vegetables and a delicious broth I am sure you will love it too.

You will love all these delicious weight watchers recipes for breakfast, lunch, dinner, and dessert!

Weight Watchers Breakfast Recipes

These skinny pancakes are perfectly fluffy and delicious and you would never know that they are just one Weight Watcher Smart Point each! These pancakes have no added sugar or fat and are made with greek yogurt so they have 3 grams of protein in each pancake.

This Skinny Eggs Benedict is a going to surprise you! All the taste, none of the guilt.

These Ham and Cheese Egg Cups are the easy, healthy low carb breakfast recipe you need!

Remember Cinnamon rolls? You won’t have to give those up! With this cinnamon roll recipe, you can manage your points and eat a cinnamon roll.

This blueberry banana bread won’t make you feel like you are loosing out on anything. It is perfect for a breakfast on-the-go.

Weight Watchers Lunch Recipes

Check out these light Bacon Ranch Turkey Wraps. Bacon, roasted turkey, cheese, ranch, and crunchy vegetables rolled into a low-calorie wrap for just 6 Weight Watchers Points.

Slim & Healthy Chicken Salad with Chopped Apples & Dried Cranberries. Leftover rotisserie chicken, apples, celery, and dried cranberries in a light creamy Greek yogurt-based dressing combine to create this light and delicious healthy chicken salad with apples and cranberries.

This Weight Watchers Avocado BLT Sandwich has light mayonnaise, green onion, water, salt, black pepper, reduced calorie wheat bread, reduced fat turkey bacon, fresh tomato, baby arugula, avocado. You are not giving anything up with this on the menu.

These Spicy Tuna Avocado Wraps are light and fresh, full of flavor and only take 5 minutes to make! The perfect healthy lunch for a busy work week!

This Grilled Ham and Three Cheese Sandwich may seem to be too good to be true but it is not!  Try it and see for yourself.

Weight Watchers Dinner Recipes

These turkey taco lettuce wraps not only taste amazing but they are a breeze to prepare and they are something you will feel great about feeding your family.

Pepper Steak is on the menu. This recipe has plenty of flavors without the calories.  It reminds me of steak fajitas.

These Crispy Parmesan Strips are only five points! You can have a delicious dinner you love and watch what you eat.

Hawaiian Chicken Skewers – so tasty and flavorful and two skewers are just 220 calories or 1 Weight Watchers SmartPoint makes it so you can eat till you are full.

7-Point Weight Watchers stuffed shells recipe. Weight Watchers pasta dinner idea. Stuffed shells made with low-fat ricotta and mozzarella cheeses, red sauce. 

Easy Weight Watchers Recipes

This garlic shrimp recipe is only 2 points per serving. Delicious and easy-to-make Weight Watchers dinner idea your whole family will really love.

Best Salisbury Steak Ever looks like a must-have recipe to me! 

Do you have a love for Chicken Parmesan? You will want to add this to the list.

Pure comfort food, this chicken pot pie recipe will hit the spot.

Put some potatoes on the menu! These twice-baked potatoes only take just two points.


Weight Watchers Dessert Recipes

To be successful with any diet I think chocolate has to be on the list. These two-point brownie bites are a guilt-free way to have some chocolate.

These peanut butter balls are easy to make, no-bake dessert! Only two points each!

These skinny funfetti cupcakes will make it possible for you to not miss out on any fun! Perfect for a birthday or celebration. Just whip them up in advance so you don’t have to miss out on the cake.

We don’t want you to deny yourself some flavorful dessert especially after a tasty meal! Here’s a perfect dessert for all of us skinny peach cobbler. This is perfect for satisfying your next sweets craving while on a Weight Watchers diet plan.

Did someone say cheesecake? Lighter mini cheesecakes with oreo crust are what you heard. With this recipe, you don’t have to give up cheesecake.

Don’t miss a thing! Sign up to get crafty ideas, recipes, sewing tutorials and more delivered right to your inbox. Follow Skip to My Lou on FB and Google+ to find out the latest news! Join me at Pinterest and Instagram for an extra dose of fun!

The post Weight Watchers Recipes appeared first on Skip To My Lou.

FANtastic Teacher Gifts Teachers Will Love

$
0
0
phone fan FANtastic teacher gift

Need FANtastic teacher gifts? This teacher appreciation gift uses a cool phone fan to let your teacher know they are FANtastic. I love thinking of items that pair with  cute sayings to make fun gifts.  I usually always share a printable gift tag to make it super easy to thank your teacher. It is easy to  show your appreciation with a meaningful gift made just for them. I am all about finding the best teacher gifts to show these often underpaid  and overworked role models just how much they mean to us and our children.
FANtastic phone fan teacher gift

Download the free printable. Print on colored card-stock. Cut out the teacher cards. You can purchase the fans here. This may be a better deal here.

{FANtastic Phone Fan Teacher Gift Download}

Phone Fan Teacher Gift supplies

Use a sharp to to make a tiny hole on the gray dot printed on the lower front of card. Fold the card on the dotted lines. Punch two holes at the top of the card. Since I was using thin twine, I used a smaller hole punch.

teacher gift punch holes

Remove the fan blade from the body of the fan.  Place the metal piece through the card.

place fan in card for teacher

Use twine or ribbon to tie the card together.

tie up teacher card

Tadah!  This teacher gift is inexpensive and easy to make, but will blow them away!

fantastic teacher gift

I bet your teacher will appreciate this gift during recess!

teacher gifts

I also have a regular phone fan gift.  This one is great for any FANtastic friend that spends loads of time outdoors!

phone fan gift

More Teacher Gifts

Looking for more teacher gifts? Here are a few more ideas.  We have ideas for hundreds of teacher appreciation gift ideas. Our teachers give our children the most important gifttheir education. Show your appreciation with one of these cute teacher gifts ideas.

First, have your teacher fill out the teacher favorite things questionnaire. You will know exactly what they would like all school year!

Favorite Things Teacher Questionnaire

Printable Teacher Gifts

These are teacher gifts your teacher will love receiving and your child will love giving!

back to school gift marker teacher gift blooming flower teacher gift printable ice cream cone gift card holder

Back to School Teacher Gifts

Welcome your teacher back to school with these darling ideas.  You will have loads of gift tags for the best teacher gifts

Back to school teacher gift tags

back to school gift tags

Was your teacher “mint” to be? These candy-filled jars are an easy way to start the school year off right.

Sweet Teacher Gifts

back to school teacher gift tags

End of School Teacher Gifts

Teachers love gift cards. Wrap them up super cute with these printable envelopes.

Teacher Gift Card Envelopes

teacher gift card holders

Relaxing Teacher Gift

tote filled with relaxation summer items for teacher gift

If you want loads of gift cards already made… you just print and attach to a gift.

Teacher Appreciation Gift Tags

teacher gifts


The post FANtastic Teacher Gifts Teachers Will Love appeared first on Skip To My Lou.

Applique Monogram Letters with FREE printable letters

$
0
0
applique

These monogram letters will take your projects up a notch by embellishing them with applique. Printable letters make applique easy!

monogram letters

What is Applique?

Pieces of decorative fabric are attached to another piece of fabric with decorative stitching.  I made one of these monogrammed totes for a little birthday gift and it was quick and easy.  You can even include a coordinating crayon roll.

I  purchased the totes awhile ago (okay years ago and found them in the “great craft room clean-up”). Find similar totes at large craft stores.  Use this machine applique technique to embellish t-shirts, onesies for babies, aprons etc. No worries if you can’t find a premade tote bag. I have a step by step tote bag tutorial.  Making a tote is a super easy sewing project.

Monogram Letter Supplies

  • Lightweight Heat n’ Bond Lite’
  • something to applique, a tote is used in this project
  • fabric
  • iron
  • sewing machine
  • thread
  • scissors
  • pencil or pen
  • printer and paper to print the templates
  • printable letters templates

Applique Step by Step

It just a few easy steps you can embellish a variety of projects. You won’t believe how easy it is! I use interfacing to make monogramming simple.  HeatnBond lite is an two-sided iron-on interfacing that has a paper backing on one side.

tote-1 tote-2


Printable Alphabet Letters

You can use any shape but I used these printable letters.  Each link below has the upper and lowercase letter. Click, download and print the free printable alphabet stencils templates. They are perfect to cut out for a template. It makes tracing letters a breeze.

Letter A

Letter B

Letter C

Letter D

Letter E

Letter F

Letter G

Letter H

Letter I

Letter J

Letter K

Letter L

Letter M

Letter N

Letter O

Letter P

Letter Q

Letter R

Letter S

Letter T

Letter U

Letter V

Letter W

Letter X

Letter Y

Letter Z

Types of machine applique

Here are three different types of applique that you can use to monogram your projects with these letters.

Straight Stitch Applique

For this project, I am using a technique called straight stitch applique. It is the simplest method and easily dressed up any project.  Once washed the edges of the fray can fray giving texture and interest. No worries if you don’t like that I show you what product to use to prevent fraying below. Another example of the straight stitch without interfacing is on this birthday hat.

Zig Zag Applique

These monogram letters could also be zig-zag appliques.  This technique keeps the edge of the fabric from fraying. The stitch length on the sewing machine can be adjusted to sew a wide zigzag or close together to make a satin stitch.

Reverse Applique

I think reverse applique gives a wow. I think it is especially great for felt projects. You can see how I used reverse applique for this birthday crown.

How to machine applique monogram letters

Trace your letter onto the paper (smooth) side of the HeatnBond Lite.  The letter must be reversed. Following the HeatnBond instructions, iron it to the wrong side of the fabric that you want to applique to the tote.

machine applique

Cut out the letter and peel off the paper.

tote-4There is now adhesive on the back (wrong) side of the letter. Flip the letter over and it is ready to go.

tote-5Again following package instructions, iron your letter to the tote bag.  Keep the letter towards the top so you are able to easily sew with the sewing machine.

how to applique

Machine stitch around the letter.  You can also hand stitch around the letter.  A blanket stitch looks cute!

appliqueI used fray check around the edges to keep the fabric from fraying.  You might decide to let the edges fray—–it looks good too!

tote-8

Finished! It is so quick and you have a really useful gift. These monogram letters could be used to monogram towels, shirts, blankets. The possibilities are endless.

monogramed tote bag with applique

I hope you will give it a try.  Let me know if you have any questions.


The post Applique Monogram Letters with FREE printable letters appeared first on Skip To My Lou.

Easy Summer Salad Recipes

$
0
0
salad

I love an easy summer salad, a recipe that comes together quickly and doesn’t heat up my kitchen is always on my list. Here are some easy summer salad recipes that can be thrown together last minute and even use food fresh from your garden.  Here is watermelon salad recipe we make with ripe summer watermelon. If you like watermelon you might also like this watermelon lemonade.

Easy Summer Salad Recipes

This berry orange spinach salad is delicious, flavourful, and so easy and fast to put together! Leafy spinach, juicy mandarin oranges, sweet and tart raspberries and blackberries, creamy feta cheese, and crunchy walnuts are tossed together with a simple 4-ingredient vinaigrette that’s sweet and tangy.

It’s simply a great spring or summer salad that’s perfect as a meal for two or as a side dish for four.

easy salad

BLT Caesar Salad combines the delicious flavors of a BLT with the simple perfection of Caesar Salad. The perfect side or main dish, this salad comes together quickly and is sure to be a hit!

Do you love beets? It seems you either love them or hate them. I love Beet salad. The beauty of the recipe is how effortless it is to whip up. It’s basically adding all the ingredients to a bowl and stirring to combine.

easy salad recipes

I love a good melon salad. This is the perfect time of the year to make a quick and delicious melon salad. Especially if you have fresh basil in your garden.

summer salad

If you love potato salad but don’t love the heavy calories you will love this potato and grilled corn salad, its a lighter recipe but still tastes so delicious too!

salad

Stop by tomorrow for another Made By You Monday. Many of these recipes featured today were chosen from there. Who knows ‘s maybe next week I will be featuring you?

Don’t miss a thing! Sign up to get crafty ideas, recipes, sewing tutorials and more delivered right to your inbox. Follow Skip to My Lou on FB and Google+ to find out the latest news! Join me at Pinterest and Instagram for an extra dose of fun!

The post Easy Summer Salad Recipes appeared first on Skip To My Lou.

Made By You Monday

$
0
0

It’s Monday show us what you’ve got. It is time to link up your crafty goodness! Please don’t forget to link back! — a text link at the bottom of your post, or link somewhere on your blog is okay!

made by you monday


By linking up to Made By You Monday. You give permission for one photo and a link to be featured in a post, and on social media.  This is to promote you and your site.

The post Made By You Monday appeared first on Skip To My Lou.


US Map Game {FREE Printable US State Map}

$
0
0
united states game

This US map game is a great way to help your kids learn about the United States while they play a game they love….BINGO!   Simply print out this free state map and start the fun.  This is just one of the many Kids Crafts and Activities we are sharing this summer here on Skip to my Lou. Just check out this boredom buster idea list for even more inspiration.

US Map Game

US Map Game

I’m Jamie from The Crafting Chicks. We LOVE Cindy, and are so inspired by Skip to My Lou! I’m excited to be here today sharing an adorable game idea to help your little ones learn about the United States of America.

US State Map

I love the lazy mornings and easy going days of summertime. But, it’s not too fun when the boredom steps in! We’ve have decided to sprinkle in some learning to beat the boredom blues! Why not learn more about the 50 States with a printable US State Map and turn in into a bingo game. Kids will have fun exploring their world.

This US Map Game is a perfect way to teach about the 50 States. It will give your kids a fun geography quiz. I have a 6-year-old who is obsessed with learning about the States, and this Bingo game has been a hit!
free bingo game

How to play US Map Game

This game is super simple to play. We use M&M’s for markers, or you can use cheerios! You choose.

Give clues about the states. Players will try and find out which State you are thinking of. We also talk about cities and capitals. This is a great way for kids to learn their capitals!

The first to get 10 correct states wins! Or you can play until blackout! We Love using the site 50 States to get ideas for our USA bingo. You can find information about each state. The Bingo caller can use these when calling out clues!
sm us bingo 3Such a fun way to learn about the 50 states! You could ask the State Capitals.

States and Capitals List

  1. Alabama – Montgomery
  2. Alaska – Juneau
  3. Arizona – Phoenix
  4. Arkansas – Little Rock
  5. California – Sacramento
  6. Colorado – Denver
  7. Connecticut – Hartford
  8. Delaware – Dover
  9. Florida – Tallahassee
  10. Georgia – Atlanta
  11. Hawaii – Honolulu
  12. Idaho – Boise
  13. Illinois – Springfield
  14. Indiana – Indianapolis
  15. Iowa – Des Moines
  16. Kansas – Topeka
  17. Kentucky – Frankfort
  18. Louisiana – Baton Rouge
  19. Maine – Augusta
  20. Maryland – Annapolis
  21. Massachusetts – Boston
  22. Michigan – Lansing
  23. Minnesota – St. Paul
  24. Mississippi – Jackson
  25. Missouri – Jefferson City
  26. Montana – Helena
  27. Nebraska – Lincoln
  28. Nevada – Carson City
  29. New Hampshire – Concord
  30. New Jersey – Trenton
  31. New Mexico – Santa Fe
  32. New York – Albany
  33. North Carolina – Raleigh
  34. North Dakota – Bismarck
  35. Ohio – Columbus
  36. Oklahoma – Oklahoma City
  37. Oregon – Salem
  38. Pennsylvania – Harrisburg
  39. Rhode Island – Providence
  40. South Carolina – Columbia
  41. South Dakota – Pierre
  42. Tennessee – Nashville
  43. Texas – Austin
  44. Utah – Salt Lake City
  45. Vermont – Montpelier
  46. Virginia – Richmond
  47. Washington – Olympia
  48. West Virginia – Charleston
  49. Wisconsin – Madison
  50. Wyoming – Cheyenne

free bingo game

US State Map

Printable US State Map

Just download, print the State map in color on cardstock or heavyweight paper and you have a US Map Quiz Game!

Download Here. PERSONAL USE ONLY PLEASE. All printables belong to The Crafting Chicks, LLP.Download Black

For more fun, visit The Crafting Chicks. They are always bursting with amazing games, printables, crafts, recipes and more! All at your fingertips.

Hope you and your kids like this United States Map Quiz! This State Map makes it easy!

The post US Map Game {FREE Printable US State Map} appeared first on Skip To My Lou.

This Year Is Going To Be Sweet Gift

$
0
0
this year is going to be sweet gift tag on candy

Let kids and teachers know this year is going to be sweet! Attach these cute little tags to a sweet teach for a back to school treat!
this year is going to be sweet gift tag on candy

This Year Is Going To Be Sweet Gift Idea

Download the file, print in color on white cardstock.

{This Year Is Going To Be Sweet Gift Tag Color}

If you don’t want to use colored ink here is a black and white version. Print these tags in black and white on colored cardstock.

{This Year Is Going To Be Sweet Gift Tag Black & White}

back to school gift tag on candy

Do you send your kids back to school with a little gift?  It is a fun way to get kids excited about the school year.  We made these gifts for our Back to School Party. Have a bright school year tags are a perfect way to gift markers, highlighters, paints or crayons.

back to school gift

Sending a gift to your child’s teacher is a great way to start their year off right.  Check out these sweet gift ideas.

Back to School Teacher Gifts

Back to School Teacher Gift Tags

We love celebrating teachers. Be sure to look at these 55 Back to School Teacher Gift tags. How do you celebrate the beginning of school?

Do you take the first day of school photo?

First Day of School Signs (these chalkboard signs are updated every year)

First Day of School Sign

If you want to create a keepsake and record the special moments of the new school year have your child fill out this Back to School Coloring Page.

First Day of School Coloring Page

We love celebrating teachers! You will always be prepared to thank a teacher with one of these Teacher Appreciation Gift Ideas. These are the best ideas for showing your teacher how thankful you are for their hard work and that their teaching is just “write.”

Rolo Pencil Gift

DIY Rolo pencils Printable

I know this year is going to be sweet with these fun ideas! Have a great year!

The post This Year Is Going To Be Sweet Gift appeared first on Skip To My Lou.

You Are Just ‘Write’ Rolo Pencil Gift

$
0
0

Do you have a friend that is just right? Give them a You Are Just “Write” Rolo pencil. It is easy to make and a fun way to show appreciation for friends, office mates, and teachers! I do have a Rolo candy pencil for teachers though if you like, scroll to the bottom!

you are just write rolo pencils

Rolo Pencil Supplies

rolo pencil supplies

Download the Rolo template and print in color on regular copy paper. Cut out the wrappers and also the small circle for the top of the pencil.

printable rolo pencils printable

Wrap the printable template around the Rolo candy and fasten with glue. Glue the pink circle to the top of the pencil to finish off the eraser!

wrap printable around rolo

Attach a Hershey Kiss to the bottom of the pencil.  I have had good luck with using a generous amount of glue stick to secure.  However, hot glue would also be a good choice if you need it more secure.

just write rolo pencil gift

There you have it a Rolo pencil! A sweet treat for a friend that is just ‘write’.

Here is the Rolo pencil just for teachers!

Rolo Candy Pencil Teacher Thank You Gifts

DIY Rolo pencils Printable

Rolo Candy Crafts

Here are some more fun Rolo candy crafts!

More Gifts For Friends

If you love telling your friends how special they are you might like these cute printable gift tags. These tags are paired with a cute little gift and are perfect for teachers and friends.

20 Printable Teacher Gift Tags

These friendship quotes and best friend quotes are another way to let your friends know how special they are.

The post You Are Just ‘Write’ Rolo Pencil Gift appeared first on Skip To My Lou.

Easy Pressure Cooker Chili Recipe

$
0
0
pressure-cooker-chili

Ready for a quick and delicious meal in the Instant Pot? Try my easy Pressure Cooker Chili! The pressure cooker can make your mealtime a snap! Doesn’t making delicious Instant Pot chili in about 10 minutes sound great? Whip up any of these soups in no time at all. I think you will really like Pressure Cooker Taco Soup and Pressure Cooker Red Lentil Soup. With all these Instant Pot Recipes in your arsenal, you will always be able to make up yummy meals in minutes!
Pressure Cooker Chili

Instant Pot Chili that is allergy friendly!

This Instant Pot chili is allergy friendly! You won’t find any gluten or hidden soy because it doesn’t use pre-packaged spices. Be sure to check the labels on the beans, broth and tomato sauce to make sure they meet your dietary needs. If you have been following along you know I have EoE. I have been avoiding wheat, eggs, soy, nuts, fish, and dairy. I am using my pressure cooker to make cooking allergy friendly quick and easy.  If you don’t have the dietary limitations I would serve this chili with the world’s best cornbread.

Instant Pot Chili in white bowl

Chili Ingredients

Instant Pot Chili has all the usual ingredients. You will find ground beef and kidney beans in a hearty sauce flavored with garlic, onion, chili powder, cumin, chicken broth, and tomatoes.

You are going to love this pressure cooker chili recipe!

Pressure Cooker Chili

With this easy Instant Pot Chili recipe, you will have chili in minutes that tastes like it slow cooked all day!

  • 1 large onion (chopped)
  • 4 cloves garlic (crushed)
  • 1 pound ground beef
  • 2 tablespoons  chili powder
  • 2 teaspoon  cumin
  • 1/4 teaspoon cayenne
  • 1 cup beef or chicken broth
  • 1 about 15 ounce can of kidney beans
  • 1 about 15 ounce can chili beans
  • 1 can (15 oz tomato sauce)
  • 1 – 28 oz can diced tomatoes (undrained (or 2 – 14.5 ounce cans))
  • 1/2 teaspoon salt
  • 1/4 teaspoon pepper
  1. Set the pressure cooker to sauté. Brown ground beef in the pressure cooker pot, drain. I lightly season the ground beef while cooking with a little salt and pepper. Add the onions and garlic to the ground beef and cook until onions are translucent and softened. Place the rest of the ingredients into the pressure cooker. Cook at high pressure for 10 minutes in an electric pressure cooker.

Be sure to check all the individual ingredient to make sure they are allergy free if you are avoiding dairy and gluten. Many store bought broths have dairy.

pressure cooker chili recipe

The post Easy Pressure Cooker Chili Recipe appeared first on Skip To My Lou.

Amazing Instant Pot Key Lime Cheesecake

$
0
0
key lime pressure cooker cheesecake

It never ceases to amaze me when I pull out a dessert from my pressure cooker.  You won’t believe that this Instant Pot Key Lime Cheesecake was made in a pressure cooker. OH MY, it is delicious. It has the perfect texture, smooth and silky yet firm. So full of flavor. I always go for chocolate desserts but this citrus cheesecake is a winner. You will not be disappointed! A pressure cooker can be life changing. You will find that healthy meals can be made in minutes. Here are some of the pressure cooker recipes my family has been enjoying.  Even if you don’t make your main course in the pressure cooker it can make the quickest sides.  Instant Pot Stick of Butter Rice is the BOMB.  It is a great side dish for your family but is also an outstanding no fail recipe for company!

instant pot key lime cheesecake

My friend Laura Finson made this delicious cheesecake. We can’t wait to share more Instant Pot desserts with you! The Instant Pot is the way to make moist yummy desserts. You must also give this Instant Pot Chocolate Chip Pumpkin Bundt Cake recipe a try. You will at least want to check out the bundt cake recipe for instructions on how to make a sling.  This sling is the key to getting your dessert out of your pressure cooker.

instant pot pressure cooker cheesecake

Instant Pot Key Lime Cheesecake

Instant Pot Key Lime Cheesecake

Yes! Dessert in the Instant Pot. This rich creamy cheesecake won’t disappoint!

For Crust:

  • 1 c graham cracker crumbs
  • 3 T butter (melted)

For Cheesecake:

  • 16 oz Cream Cheese (softened to room temperature)
  • 2 t Flour
  • ½ c Sugar
  • 2 t Vanilla
  • Zest of 1 Lime
  • 2 Eggs
  • 1 Egg Yolk
  • 2 T Heavy Whipping Cream
  • 3 T Key Lime Juice

Topping:

  • ¾ c Heavy Whipping Cream
  • 2 T Sugar
  • Zest of 1 Lime
  • 10 Thin Lime Slice Halves

For Crust:

  1. Spray a 6” springform pan with non-stick spray and set aside.  In a small bowl combine graham cracker crumbs and melted butter and stir together with a fork. Press firmly into the bottom of the sprayed springform pan, then set aside.

For Cheesecake filling:

  1. With an electric mixer beat together: cream cheese, flour, sugar, vanilla and zest of one lime. Scraping sides and bottom to ensure all ingredients are mixed together well (to avoid any lumps). Add eggs one at a time and then egg yolk. Beat until just combined. Mix in Key Lime Juice (if you can’t find Key Lime Juice, you can substitute lime juice) and Whipping Cream until just combined. Pour over crust. Tap pan gently on the countertop a few times to get rid of any large air bubbles.

Cooking:

  1. Add 1.5 cups water to pressure cooker insert. Then place the trivet in bottom of the insert. Lay a paper towel over the top of the springform pan (dry paper towel) and then wrap tightly with aluminum foil. Place pan in the pressure cooker using a sling. Lock lid in place and cook at high pressure for 37 minutes. Once cooking is completed let pressure release naturally for 18 minutes.

  2. Carefully remove from the pressure cooker and remove foil and paper towel. Set on wire rack and cool for 10 minutes. Then carefully run a sharp paring knife around the perimeter (between cheesecake and pan edge). Let cool for 20-30 minutes and then release the springform pan edge. Cover lightly and refrigerate overnight.

Topping:

  1. Using a large spatula, remove springform pan bottom from cheesecake and place cheesecake on serving platter. Place whipping cream and sugar in a mixing bowl and then whip until stiff. Fold in the zest of ½ of a lime (keep remaining ½ of lime to zest over the top for a lovely presentation).

  2. Place whipping cream in a piping bag with a large open star tip and pipe onto top of the Instant Pot cheesecake, then zest remaining half of lime over the top of the whipped cream and center of cheesecake. Place lime slice halves around the perimeter of cheesecake equidistance apart by sliding gently into whipped cream. 

  3. Refrigerate (covered) until ready to serve. Enjoy!

instant pot pressure cooker desserts

Instant Pot Cheesecake

key lime pressure cooker cheesecake

I hope you love this Instant Pot Key Lime Cheesecake!

The post Amazing Instant Pot Key Lime Cheesecake appeared first on Skip To My Lou.

Viewing all 1060 articles
Browse latest View live


Latest Images